When I first got my mirrorless Sony camera, one of the photo opportunities I was really excited about was getting pictures of the stars.
These sort of photos where you’re like, WOAH. (This isn’t my picture, photo credit goes to Jeremy Thomas.)
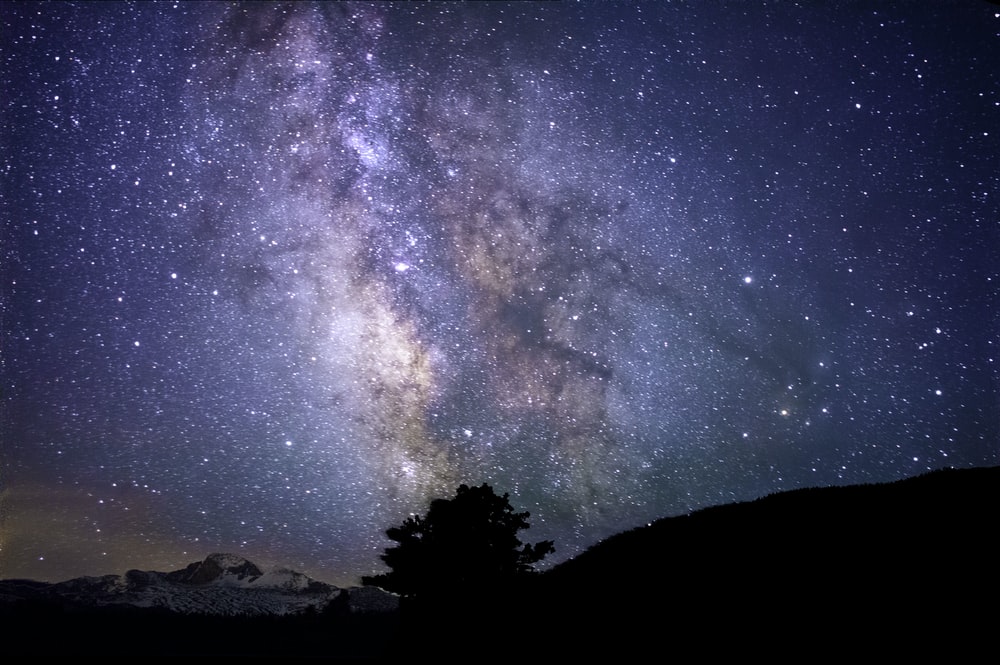
I love looking at the stars, so getting that beauty in a picture is so cool to me. I knew you had to have a pretty powerful camera with good shutter speed and exposure settings to do that, so I was really excited about getting the nicer camera.
Here’s the part I didn’t know about: any of the techniques for taking these photos. In my mind, it was basically some sort of witchcraft that photographers magically made happen.
So even with the help of the internet, my process for eventually getting some decent star photos was not fast. In fact, it was only this past month that I got some starscape shots I’m legitimately happy with — and that’s 2 ½ YEARS after I got the camera.
I’m sure I could have made this a quicker process if I took a class or gave myself more opportunities to practice, but photography is a fun side thing for me, so it’s been a slow process. And that’s okay! I’m pleased with the improvement.
I think this is a great lesson in realizing you don’t have to start off being good at something. It’s okay to be bad at something at first. Hell, it’s okay to be bad at something a year and a half into practicing it!
I didn’t just magically get my final pictures on my first try. And to prove it, I wanted to share my progression of different night-sky photo attempts I’ve done over the past two years to eventually get ones I’m happy with.
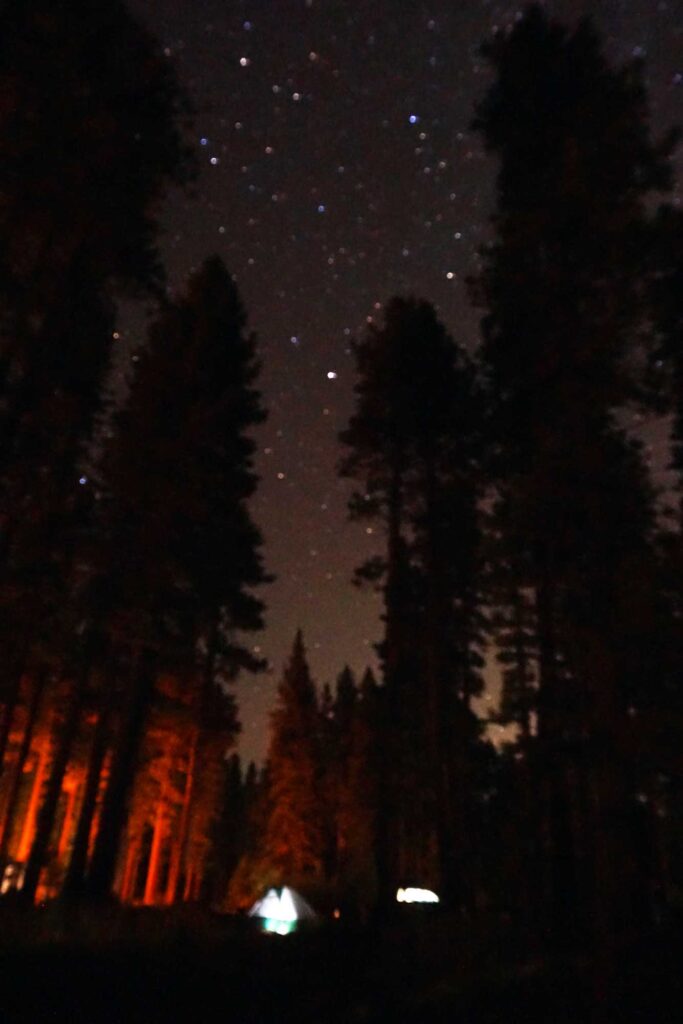
Attempt #1: Israel
Main Issue: No Tripod
Other Issues:
- Too much campsite light
- Not long enough shutter speed
- Not focused properly
Camping under the stars in Israel, I thought this would be a perfect opportunity to get some star shots! Except I was in a group, so lights were on at the campsite for most of the time meaning my camera was always taking in too much light from that.
I also hadn’t figured out my manual focus yet at the time, so all my photos were auto-focusing. This works fine in daylight, but at night, the camera doesn’t seem to take in enough light to get a good idea of where to set the focus at the start of the picture. This means you need to set it manually to get a shot that isn’t blurry. (More on this later.)
But the biggest issue? I didn’t have a tripod and I wasn’t using a timer capture. I had my camera propped up on some rocks, so it really wasn’t that stable meaning a longer shutter speed just made the photo really blurry. The shorter shutter speed meant that the camera never had time to take in the starlight.
I still got some kind of cool shots like this one (after plenty of edits), but they aren’t the starry photos I was going for.
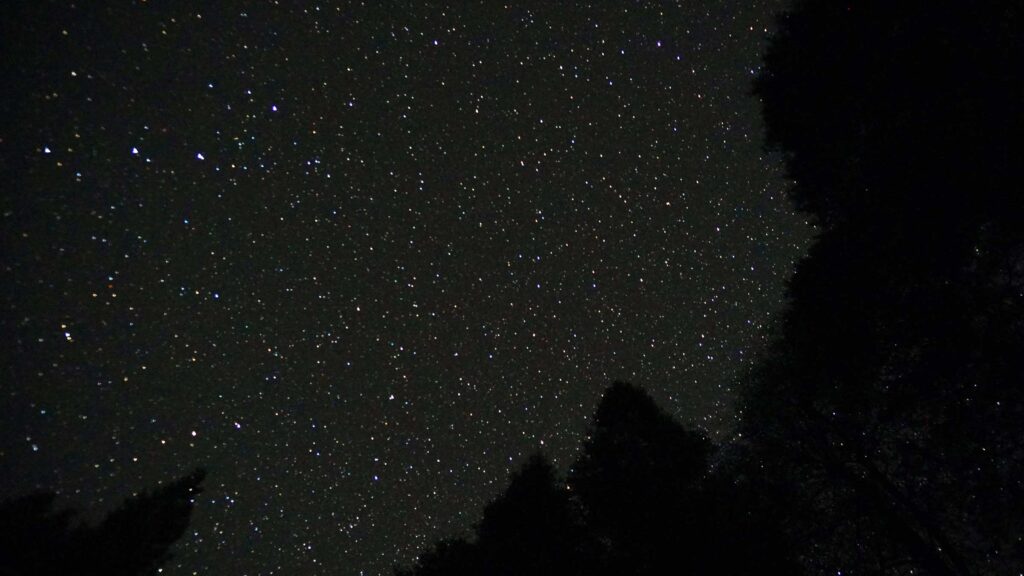
Attempt #2: Lake Tahoe
Main Issue: No Focus
These photos I had a tripod for, so I could use a longer shutter speed and tilt the camera up to get pictures at different angles. At the time, I was still really happy with the result because it was taking in the starlight!
However, do you notice how out of focus the stars are? I could not for the life of me figure out how to get them in focus! My automatic focus had gotten glitchy and I couldn’t figure out how to set it to manual focus, so I just had these kind of nice, really blurry photos.
Again, I was still excited about getting any stars in the shot, but it still wasn’t exactly the pictures I wanted.
After the trip, I went to the camera shop where I’d gotten the camera and they reset the setting to fix auto focus and taught me how to switch the camera to manual focus. Now, I almost exclusively keep the camera on manual focus and when setting focus for a star photo, I almost always have the focus as far away as possible.
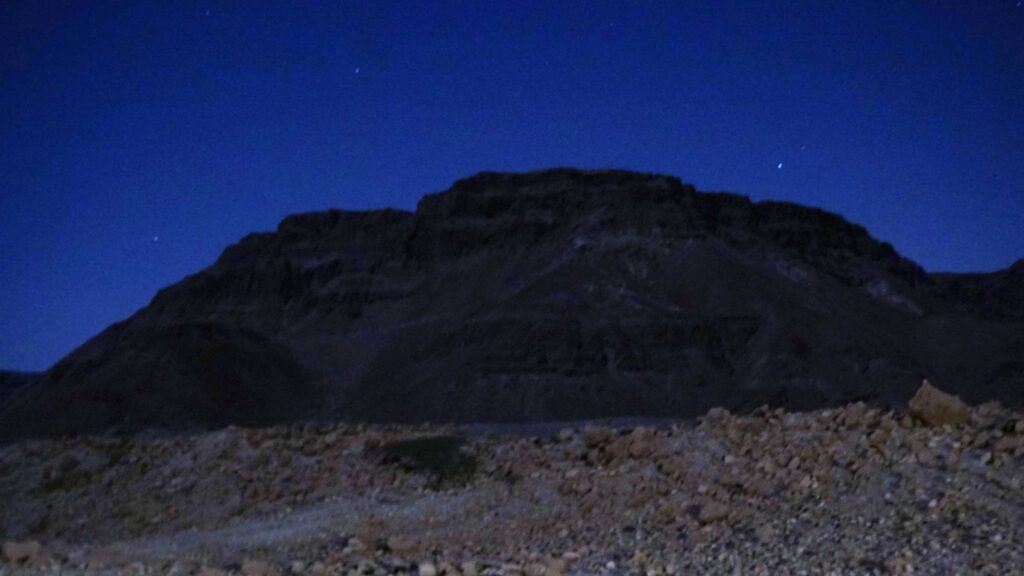
Attempt #3: Comet Neowise

Main Issue: No Set Timer
In July 2020 when comet Neowise came into orbit, I started seeing super cool photos of that comet tail and I really wanted to try my hand at it.
I had a zoom lens that I used to get a closer shot of the comet and I also managed to kind of get into focus. I’d attached my GorillaPod tripod to a railing to try to keep the camera still for the picture. But even attached, every time I clicked the button to take the picture, the camera would move a little bit and mess up the picture.
And that’s why I got pool-floaty swans in the sky rather than stars.
Later, I realized you can set a 2-second timer, so the camera takes the picture 2 seconds after you click the button. Then, when the camera is actually taking the picture, you don’t get the movement from pressing the button.
The other reason this picture didn’t quite turn out right was because I was in a place with quite a bit of light pollution. This wasn’t the middle-of-nowhere-by-myself type shot. I was with people and it was in a city neighborhood.
Attempt #4: Outside Yosemite
Main Issue: Light Pollution
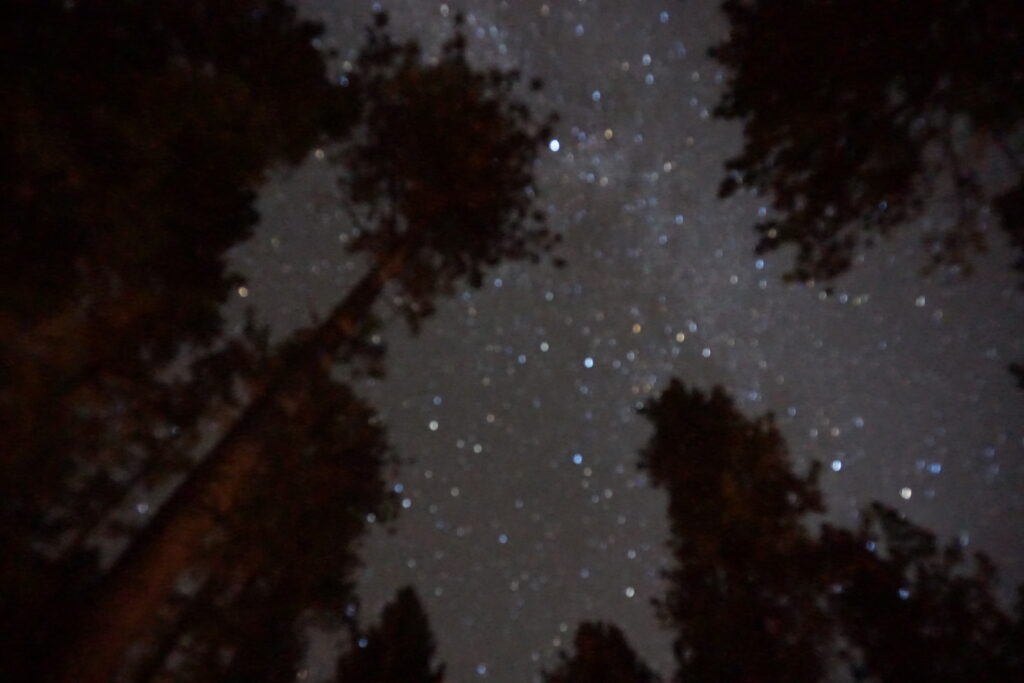
Honestly, I’m still pretty happy with this star photo I took just outside of Yosemite. I took it on my most recent trip there for the Yosemite half marathon.
I don’t remember there being a HUGE issue for why it didn’t turn out. It’s not bad, it’s just kind of meh. The stars are in focus, you can see them, and I like the tree outline. It’s just not that full milky way image I was going for in a night sky picture.
I think part of the reason for fewer star patterns here was there was some light pollution and I believe the moon was partially up. That meant even looking at it in person, there were only so many stars you could see. I was also right next to a building, so I only had a small view of the sky rather than my choice of which part to have in the frame.
Attempt #5: Success in Nevada
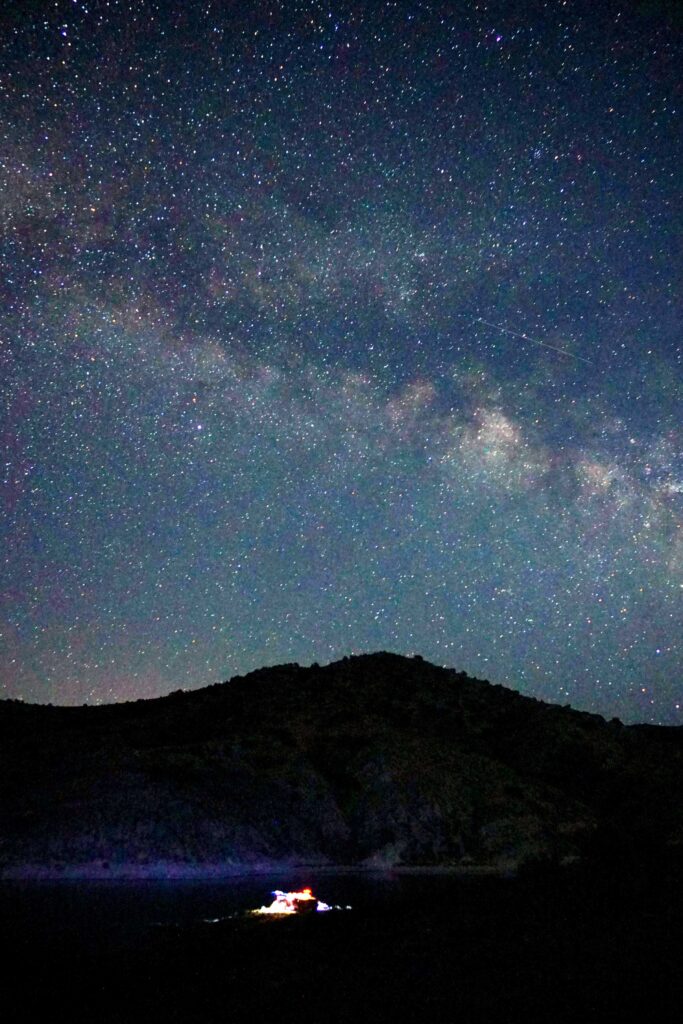
Finally!! I got the photos I was going for.
Now, this is an edited version of the original photo (all these photos have been edited). I’m sure someone who’s better with photography could edit it to be even better, but I’m really happy with how this round turned out.
I had the shutter speed on something like 25 seconds and honestly, there are more stars in this picture than you could actually see with the naked eye. I’d look at my camera to check out the picture and be like “wait, all that is really there?!?”
I think this one either went for a bit too long, or I knocked the picnic table the tripod was on, because you can see a tiny bit of movement in the stars. I don’t think it’s something you notice unless you’re looking for it, but obviously I’m looking for it.
This night was perfect though because the moon wasn’t out yet, I was camping in an area with very little light pollution and 360° views, and it was a completely clear sky.

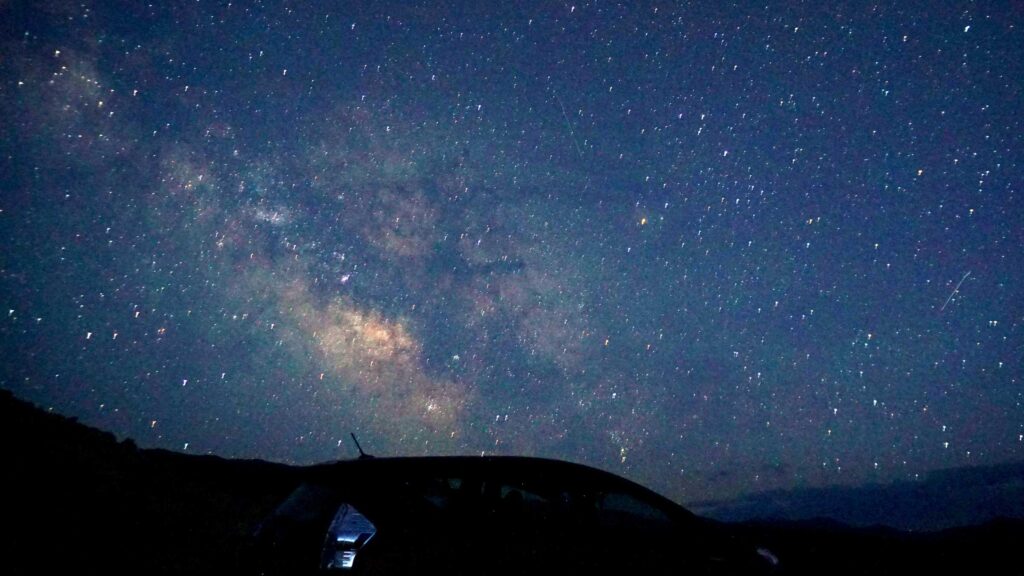
This one I took closer to where the sun had just set, so you can see where the light washes out the stars. But I like the way you can see the progression. Also, the satellite almost looks like a shooting star and I’m here for it.
So that’s where I’m at with my night sky photos! I’m sure I’ll continue to practice taking star photos and get better. I think the key thing to remember is even if you start off bad at something, if you enjoy it and keep working on it — you will get better.